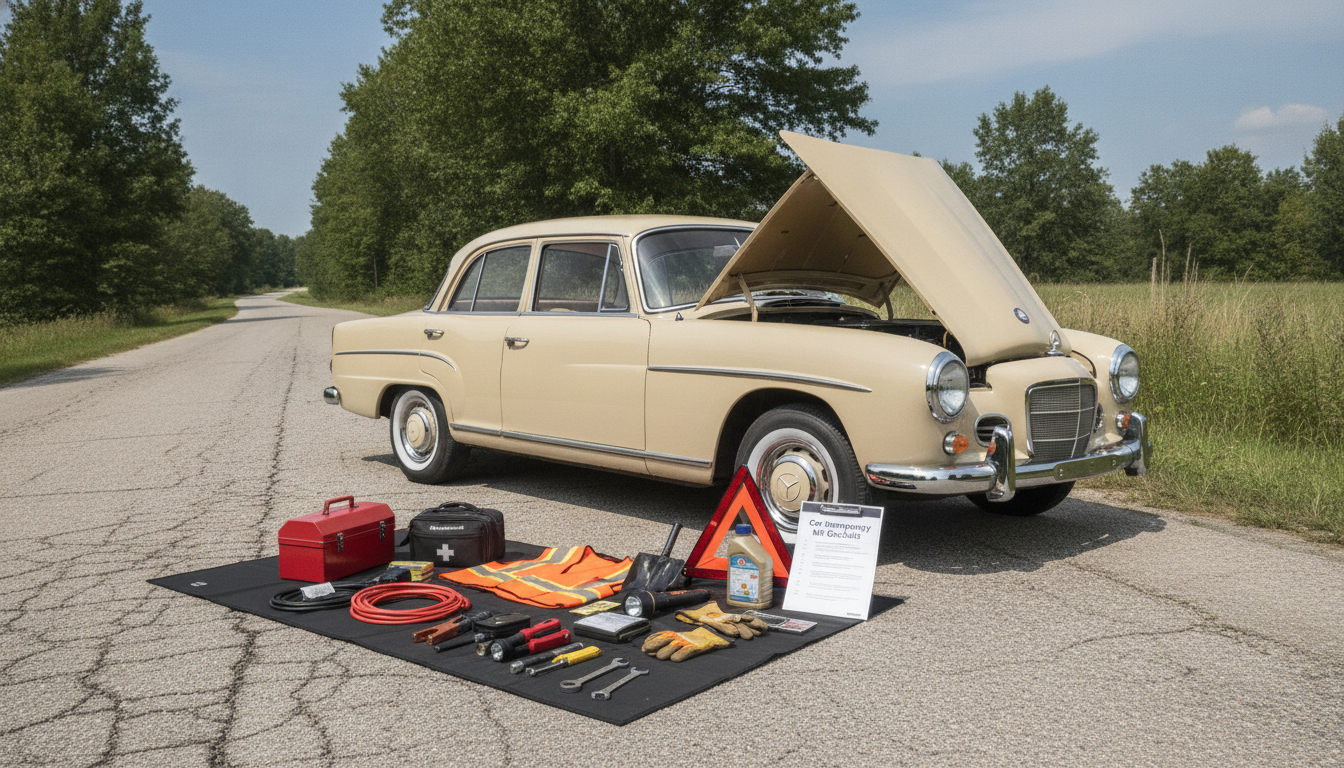
A well-stocked car emergency kit helps turn a breakdown, flat tire, sudden weather, or minor injury into a manageable delay instead of a dangerous situation. The goal isn’t to pack everything—it’s to pack the right things in the right place, so you can act fast when stress is high and conditions are changing.
To make building (and maintaining) your kit easier, keep a simple checklist with the supplies. A ready-to-print option is the Must-Have Items for Your Car Emergency Kit – Printable Car Emergency Checklist, Roadside Safety Guide, Digital Download for Drivers, which works well for first-time setup and seasonal refreshes.
Most roadside problems fall into a few predictable scenarios. Planning around them keeps the kit practical and avoids wasted space.
If you only remember one rule, make it this: visibility and positioning come before repairs. National guidance on staying safe during roadside emergencies is worth a quick review from the NHTSA.
This category is where “generic” kits often fall short. A great tool is useless if it doesn’t fit your vehicle or you can’t access it quickly.
Even if roadside assistance is on the way, the wait can be longer than expected—especially in storms, rural areas, or heavy traffic backups. Ready.gov offers practical guidance for car kits that emphasizes basics like water, warmth, and communication (Ready.gov — Car Emergency Kit).
Most roadside medical needs are minor: small cuts, blisters from walking, headaches, or irritation from dust and debris. For basic first-aid steps and safe response, the American Red Cross is a reliable resource.
If your phone is your primary lifeline, consider keeping a stable way to prop it for hands-free calls or navigation checks during a delay. The Adjustable Tabletop Phone Stand for Livestreaming & Vlogging can double as a compact, lightweight support when you’re parked and need your screen visible without holding it.
| Category | Item examples | Best storage location | Notes |
|---|---|---|---|
| Visibility & warning | Reflective triangles/flares, reflective vest | Trunk side pocket or top of kit | Place first so it’s accessible before opening other bags |
| Light & power | Headlamp/flashlight, spare batteries, power bank | Glovebox (small) + trunk (spares) | Check battery levels during seasonal refresh |
| Tire & roadside tools | Lug wrench, jack, tire gauge, inflator/sealant | Trunk near spare tire | Confirm tools fit the specific vehicle |
| Jump-start | Jumper cables or jump starter | Trunk top layer | Include quick-start instructions card |
| Medical | First-aid kit, gloves, antiseptic | Cabin or trunk top layer | Keep easily reachable for minor injuries |
| Comfort & weather | Water, snacks, blanket, poncho, hand warmers | Trunk in separate pouch | Rotate consumables; swap seasonal items |
| Info & admin | Emergency contacts, insurance details, pen/notepad | Glovebox | Paper backups help when phone isn’t usable |
If you want a ready-made list you can print, store in the trunk, and revisit each season, use the Printable Car Emergency Checklist and Roadside Safety Guide (digital download).
Check your kit quarterly or at each oil change. Rotate water and snacks, test lights and power banks, replace expired first-aid items, and swap seasonal gear before temperature extremes hit.
Start with visibility and safety: hazards on, reflective vest, warning triangles/flares, and a reliable light source. Once the scene is clearly marked and you’re positioned safely, then move to repairs or calls for assistance.
Keep the main kit in the trunk’s top layer so it’s fast to reach, and store a small “immediate-use” subset (light, vest, info card) in the glovebox or door pocket. Secure heavy items so they don’t shift, and avoid leaving heat-sensitive supplies in extreme temperatures when possible.

Leave a comment